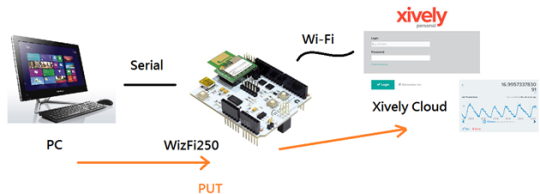
This is a simple introduction for making communication between the Xively server and Wi-Fi Module–WizFi250. In this section, you should learn more about Xively HTTP request format.
Step 1: Create your Xively Account
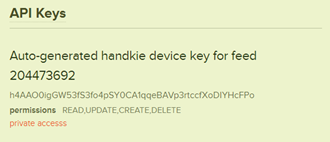
In order to Test, you should make a Xively ID and acquire Channel and API key.
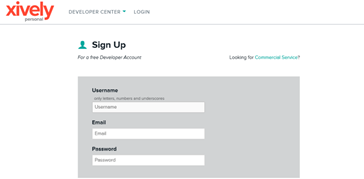
https://personal.xively.com/signup
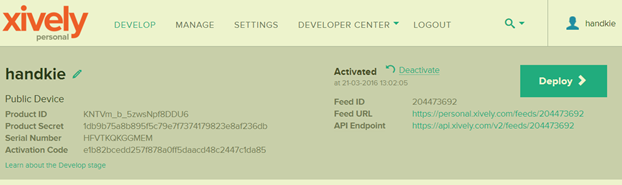
Step 2: Check Xively Account Details
(The following part coming to WizFi250)
Step 3: Obtain the Xively API sever IP
AT+FDNS=api.xively.com,3000
64.94.18.120
[OK]
Step 4 :Association to AP
AT+WLEAVE
[OK]
AT+WSET=0,wiznet,,
[OK]
AT+WSEC=0,WPA2,vickitjohn
[OK]
AT+WNET=1
[OK]
AT+WJOIN
Joining : wiznet
Successfully joined : wiznet
[Link-Up Event]
IP Addr : 10.0.1.5
Gateway : 10.0.1.1
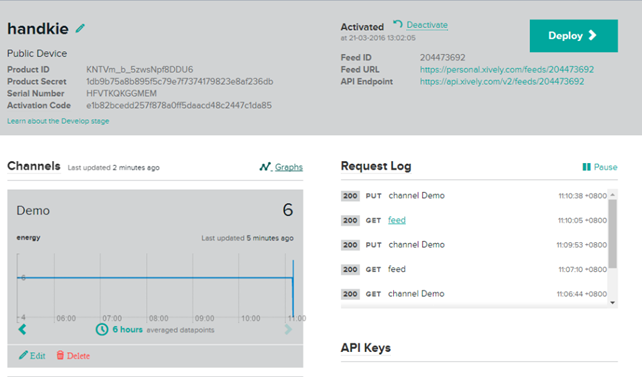
[OK]Step 5: The local data save to Xively Cloud
AT+SCON=O,TCN,64.94.18.120,80,,0
[OK]
[CONNECT 0]
AT+SSEND=0,,,235
[0,,,235]
Then, you can send “HTTP Request
format for Xively”

PUT
/v2/feeds/204473692/datastreams/Demo HTTP/1.1
Host: api.xively.com
X-ApiKey:It6XxxGZ718sU4ocZtqEqS3S3qkOaDd521vSoRfzB8nzOW7G
Content-Length:80
{
  “id”: “Demo”,
  “tags”: [],
  “unit”: {},
  “current_value”: “6
}
Step 6: Receive from the Xively API serverAccess the the Xively API sever, and then send the Request command that save the value “6 in the Channel Demo.
{0,64.94.18.120,80,251}HTTP/1.1
200 OK
Date: Thu, 07 Apr 2016
02:30:54 GMT
Content-Type:
application/json; charset=utf-8
Content-Length: 0
Connection: keep-alive
X-Request-Id:
453a3258905b24435670a552909c2840bd1f9321
Cache-Control: max-age=0
Vary: Accept-Encoding
Step 7: The Result in Xively Cloud