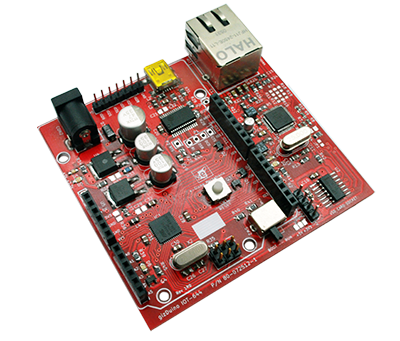
本文將會展示如何添加短信功能到您的 IoT 為基礎的項目。這篇文章是基於ATmega644 和 WIZnet W5500 以太網芯片,ThingSpeak 和 chikka API 基於gizDuino IOT-644 的 Arduino 兼容基板。


Arduino 的不具備 HTTPS 協議的原生支援,所以我們會用 Thingspeak 來觸發Chikka API。該 Chikka API 授權免費帳戶發送25條短信。
讓我們開始吧!
- 在 https://api.chikka.com/ 註冊免費試用。註冊後,驗證你的電話號碼。 Chikka 允許你用你的免費帳戶發送驗證號碼短信。留意你 chikka短代碼。
- 註冊的在Thingspeak帳戶。在 https://thingspeak.com/users/sign_up註冊。
現在,你有你的帳戶,我們配置Thingspeak
- 轉到 thingspeak.com 請使用您的帳戶,然後點擊應用程序。
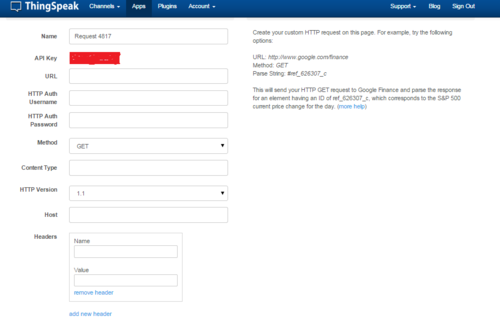
- 單擊ThingHTTP followerd由新事物HTTP。這將帶你到設置頁面。

- 將它命名為 ChikkaSendSMS
- URL 是 https://post.chikka.com/smsapi/request
-
HTTP AuthUsername 是你 chikka 客戶端 ID,而 AuthPassword 是你Chikka 的秘密鑰匙
-
設置 Method 為 POST
-
保留 Content Type 為空白。
-
單擊 remove header,Host 留空
-
將下面代碼放在主體,按您的 chikka 帳戶改變短代碼,客戶端 ID 和密鑰。
message_type=SEND&mobile_number=%%number%%&shortcode=YOUR_SHORT_CODE&
message_id=RANDOM_USER_GENERATED_32_Characters&message=%%message%%&
client_id=YOUR_CLIENT_ID&secret_key=YOUR_SECRET_KEY -
MESSAGE_ID 是從 CHIKKA 產生的唯一指令 ID。
-
保存 ThingHTTP。
Gizduino 方面
- 確保你的 Arduino IDE 修補了 gizDuino IOT644板的最新的 E-Gizmo 修補程序
- 上傳下面的代碼到你的IoT板。不要忘記改變你的 apiKey 和 sendNumbe
#include
#include

byte mac[] = {0xDE, 0xAD, 0xBE, 0xEF, 0xFE, 0xED};
char server[] = “api.thingspeak.com”;
IPAddress ip(192,168,1,200); // Change this to your ip range
// if no DHCP is present

EthernetClient client;
const String apiKey = “Your ThingHTTP Api Key”;
const String sendNumber = “DESTINATION_NUMBER”; //start with
//country code
void setup()
{
Serial.begin(9600);

Serial.println(“Gizduino Initialization”);
if (Ethernet.begin(mac) == 0) {
Serial.println(F(“Failed to configure Ethernet using DHCP”));
Ethernet.begin(mac, ip);
}
Serial.print(“DHCP Assigned IP:”);
Serial.println(Ethernet.localIP());
delay(1000);

Serial.println(“Sending SMS”);

//this function will send the sms
sendSMS(sendNumber, URLEncode(“IOT Pa More”));

}

void loop()
{

}

void sendSMS(String number,String message)
{

if (client.connect(server, 80))
{
//make TCP connection to ThingSpeak

client.print(“GET /apps/thinghttp/send_request?api_key=”);
client.print(apiKey);
client.print(“&number=”);
client.print(number);
client.print(“&message=”);
client.print(message);
client.println(” HTTP/1.1″);
client.print(“Host: “);
client.println(server);
client.println(“Connection: close”);
client.println();
}
else
{
Serial.println(F(“Connection failed”));
}

while (client.connected())
{
if ( client.available() )
{
char c = client.read();
Serial.print(c);
}
}
Serial.println();
client.stop();
}
//Encode spaces to HTML tags
String URLEncode(const char* msg)
{
const char *hex = “0123456789abcdef”;
String encodedMsg = “”;

while (*msg!=”){
if( (‘a’ > 4];
encodedMsg += hex[*msg & 15];
}
msg++;
}
return encodedMsg;
}
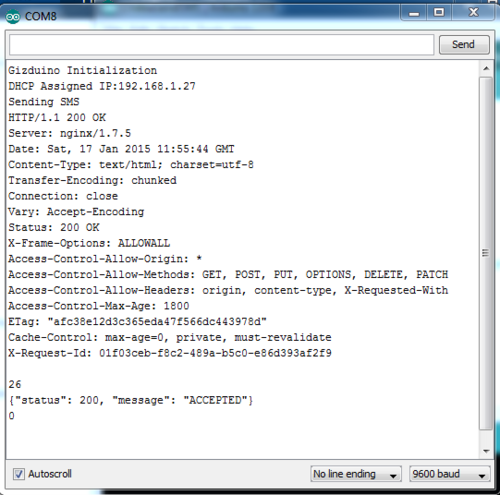
3. 一上傳,你的串行終端會得到類似下面的圖像響應

來源:philrobotics