W5100S is an embedded Ethernet controller designed as a full hardwired TCP / IP with WIZnet technology. W5100S provides internet connectivity to your embedded system by using SPI (Serial Peripheral Interface) or Parallel System BUS. For more detail please check the URL here.
Basically, W5100S allows you to connect to the Internet with your IoT devices/ embedded system. Let’s start following our tutorial below to make your device online!
Before implement W5100S into your PCB, or your circuit board, you may want to experience the function, or to get familiar with how to manipulate W5100S beforehand. The following shows, step by step, how to get started using W5100S with our Evaluation Board (EVB).
For specification or any other detail of W5100S-EVB, please refer to the link here
Preparation
Before running W5100S-EVB, you may have to do some preparation so that you can visualize the result of your running W5100S-EVB on PC finely, and eventually manipulate your W5100s without any barrier.
Software
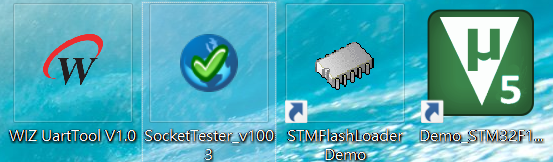
| Software (from left to right) | Description |
| UART Tool (Serial Port Terminal): | Printf/debugging message from microcontroller(MCU) would be revealed through UART. |
| Socket Testing Tool: | Allows user to communicate with any server/client through the Internet(TCP/UDP) |
| STMFlashLoader: | For user to burn their programmer into MCU with USB(UART), without using any debugger/debug probes such as J-link and ST-link. |
| Keil µVision® IDE (MDK v5.33) | Integrated Development Environment(IDE) for embedded programming |
Hardware

| Hardware | Description |
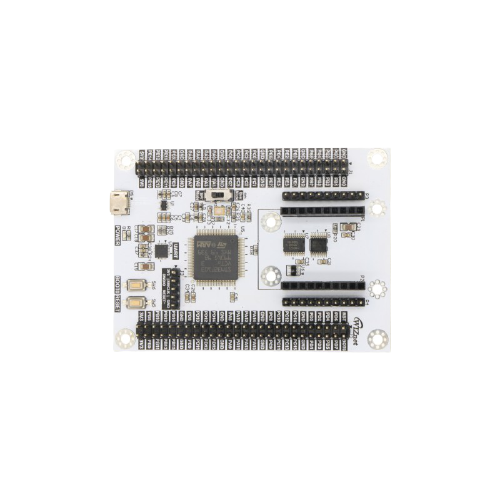
| WIZ810SMJ | Ethernet module with W5100S |
| W5100S-EVB | Breakout board for WIZ810SMJ, installed with MCU STM32F103 |
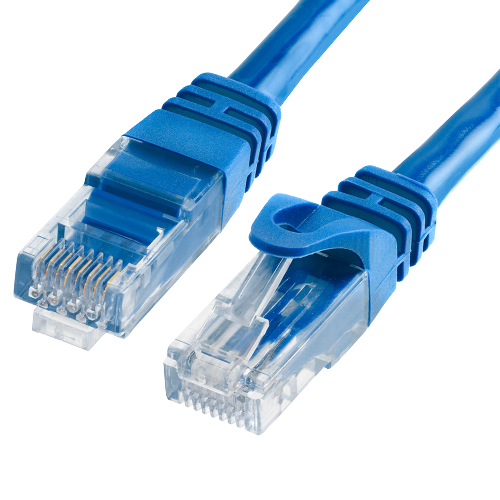
| Ethernet Cable(RJ45) | For user to connect the ethernet module(or your W5100S) to the network |
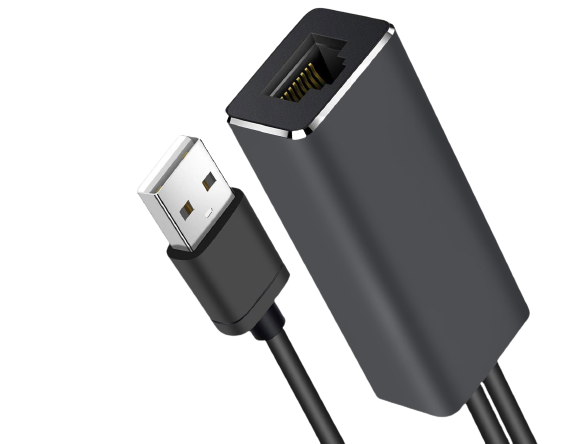
| RJ45 to USB adaptor (if necessary) | If you are using PC/laptop that does not support RJ45 |
| USB 2.0 Micro-USB B-type | For power and serial communication |
| Router (for second part of footage) | Connect your W5100S to the Internet instead of local network |
PC’s and W5100S’s IP Configuration
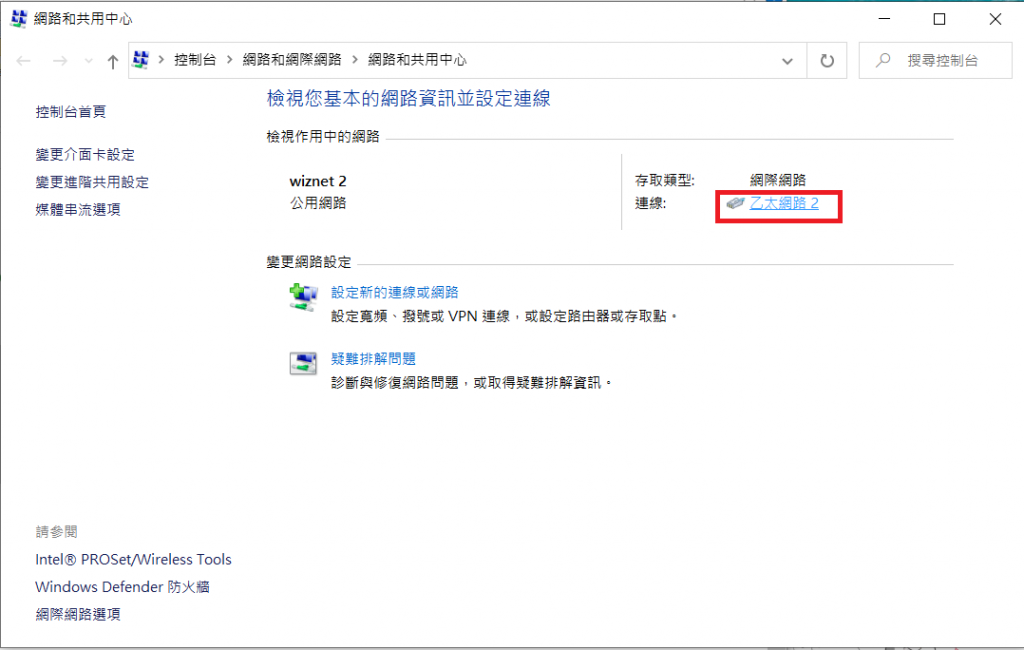
For PC IP configuration:
First go to “Network and Sharing Center”, and then click “Local Area Connection”(inside the red square) to open a new window
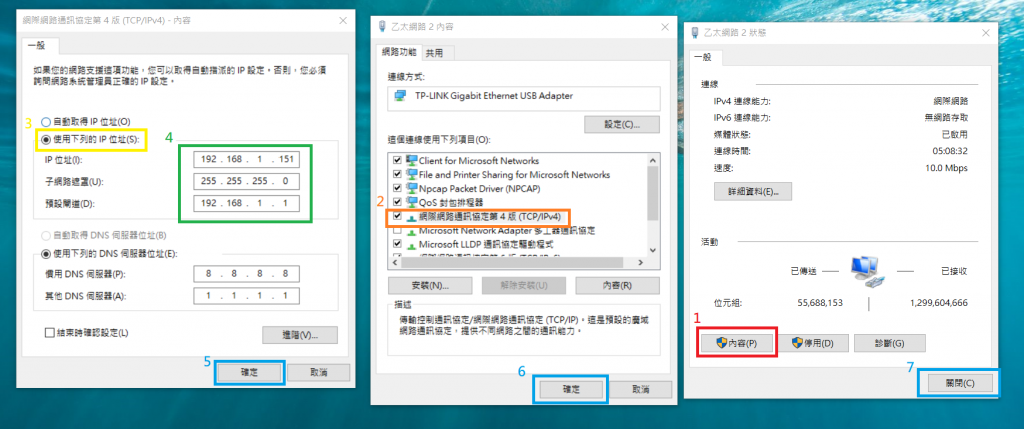
Then do the setting step by step:
- Click Content
- Double click TCP/IPv4
- Change the content that according to the picture, or to whatever works if you are familiar with Internet Protocol
- Click OK
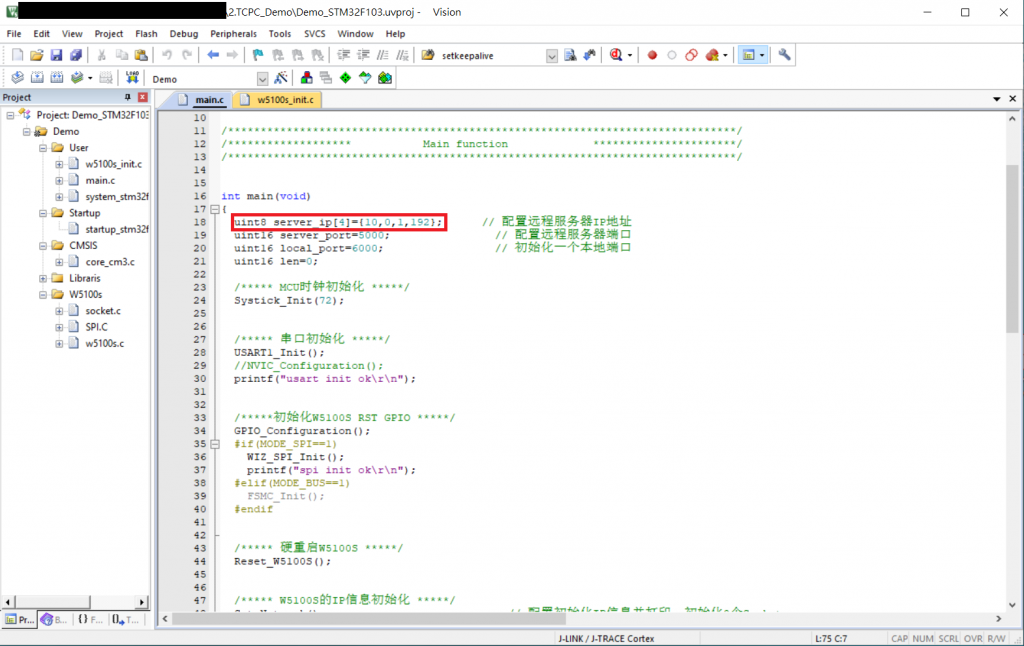
For IP configuration of W5100S-EVB:
- Open source code of W5100S(download link would be provided below)
- Go to main(), make sure the “server_ip[]” matches the IP you set previously for your PC
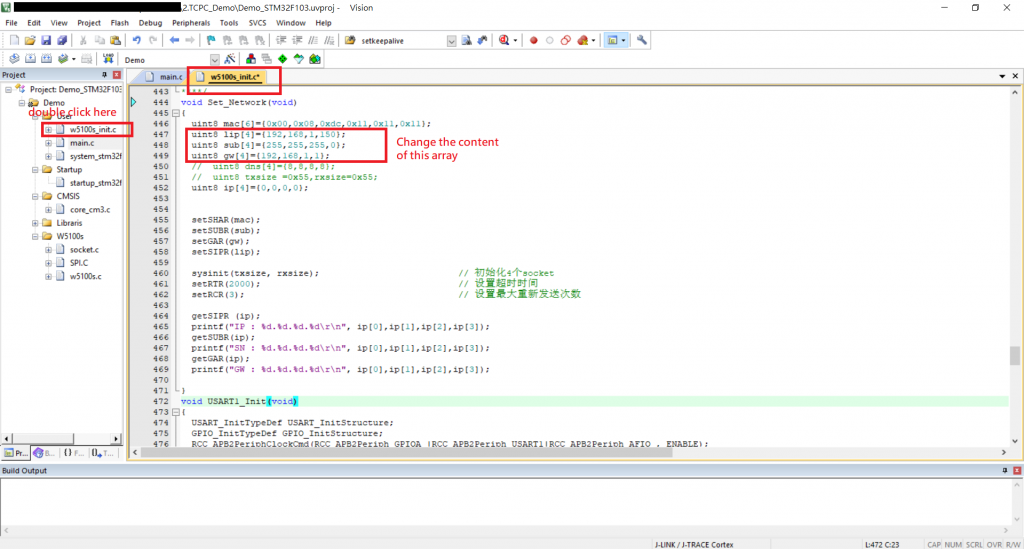
- Go the function “Set_Network()” and change the IP configuration, which should match the one you set for your PC before
- Click “Build” or “Rebuild” to generate bin file for your W5100S-EVB
Hardware Setup
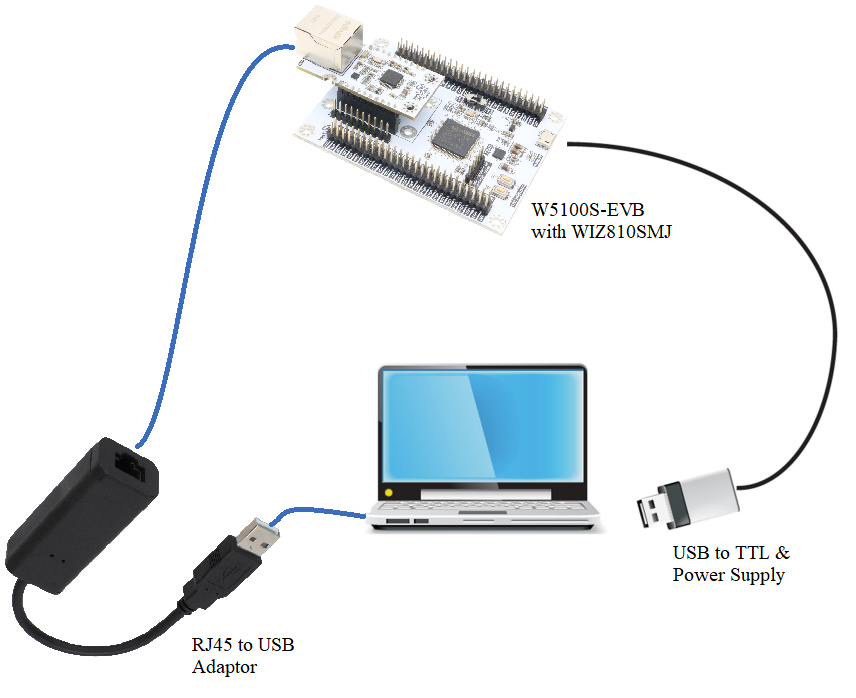
For hardware setup, you are advised to follow the picture below for TCP testing. Later in this article you will find another setup, which allows you to connect your W5100S to the Internet.
Flashloading
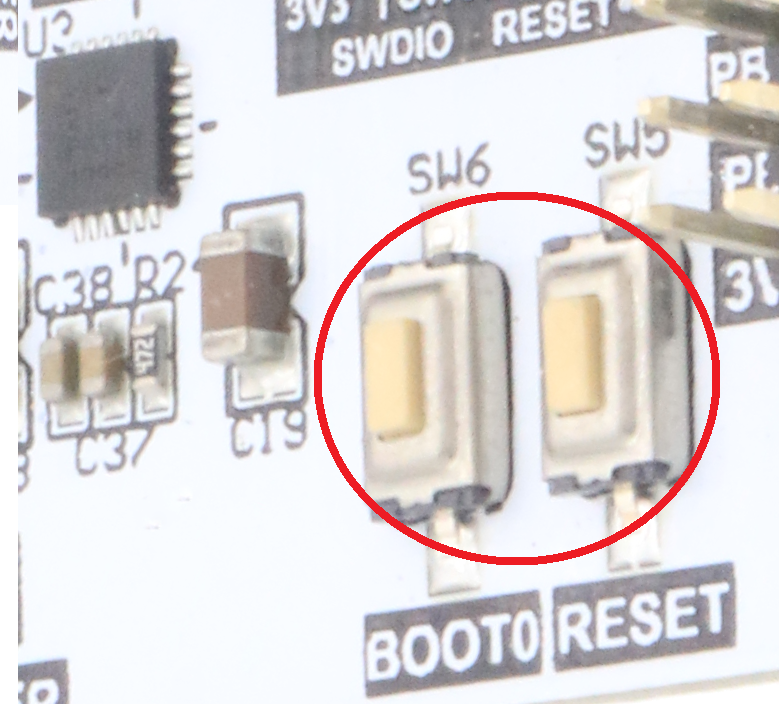
Since the W5100S-EVB would start its firmware once it powers up, you need to set it to bootloader state before you burn your code into it. Follow the steps below:
- Press and hold the button “BOOT0”
- Hold “BOOT0” and press “RESET”, hold them at the same time
- Release “RESET”
- Release “BOOT0”
After your W5100S-EVB entered the bootloader state ,follow the steps below to flash the TCP Client source code into your W5100S-EVB:
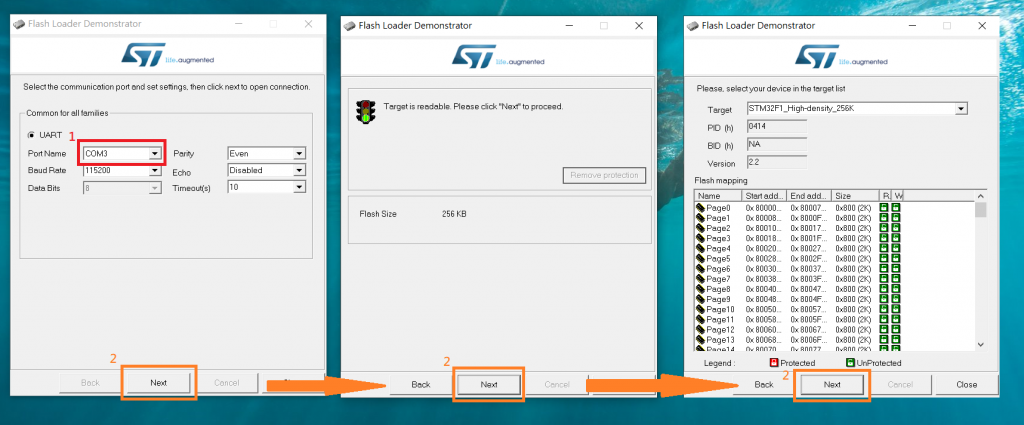
- First choose the Port of your W5100S-EVB. Please make sure the UART setting is the same as the one shown below.
- Click “Next” if your windows are the same as the following
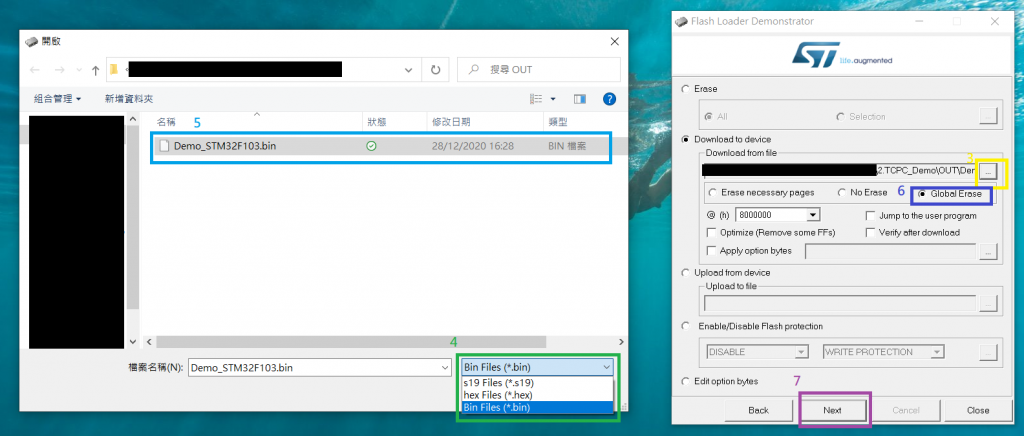
3. Choose the bin file you would like to burn into you W5100S-EVB
4. It would probably be “s19 Files” by default. You need to change it to bin file so that you are able to see the bin file ready to be burned
5. Click the desired file and then click “OK”
6. Make sure the “Global Erase” is selected, which means all data/memory in the MCU would be cleared for you to burn your new program/firmware
7. Click “Next”
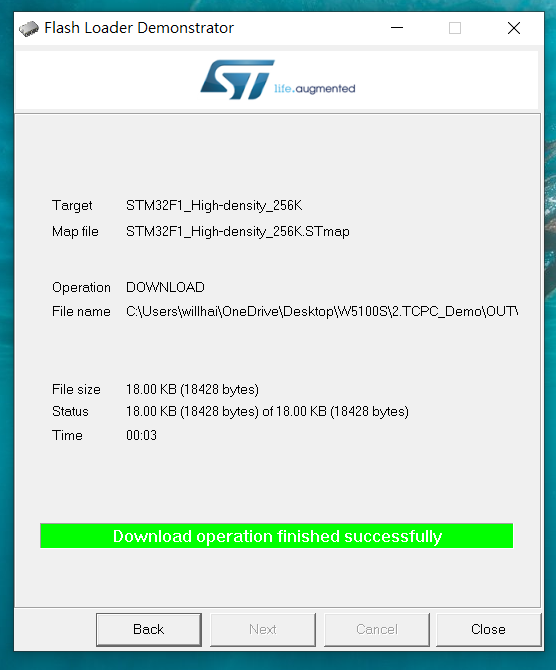
Once the message “Download operation finished successfully” pops up, click close and you are now good to test your TCP Client program.
TCP Testing
Connecting to local network for testing
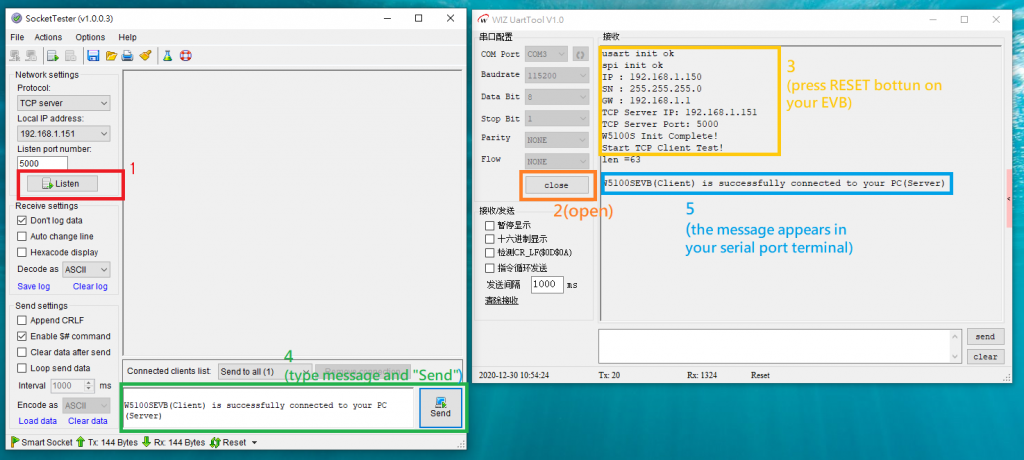
After all the setup and preparation above, you are now good to test the TCP client function with your W5100S-EVB. Open your UART terminal and Socket Tester, follow the instruction below step by step, then you will see the result:
- In Socket Tester, Choose “TCP Server”, the Local IP address as the one you set for your PC, and the click “Listen”
- Click the button “open” on tour UART terminal window
- Press the button “RESET” on your EVB and you will see the message pops out on your terminal
- Type the message you would like to send on Socket Tester and “Send” it out
- The message you have just sent appears on your terminal, meaning your W5100S-EVB has successfully received the message on its port 6000 from your PC TCP Socket port 5000 with TCP
Connect your W5100S to the Internet
After the successful testing, you may want to do the TCP client on the Internet. the first thing you need to do is to alter the hardware setup a bit. The following picture shows a typical example of how to set the hardware up:
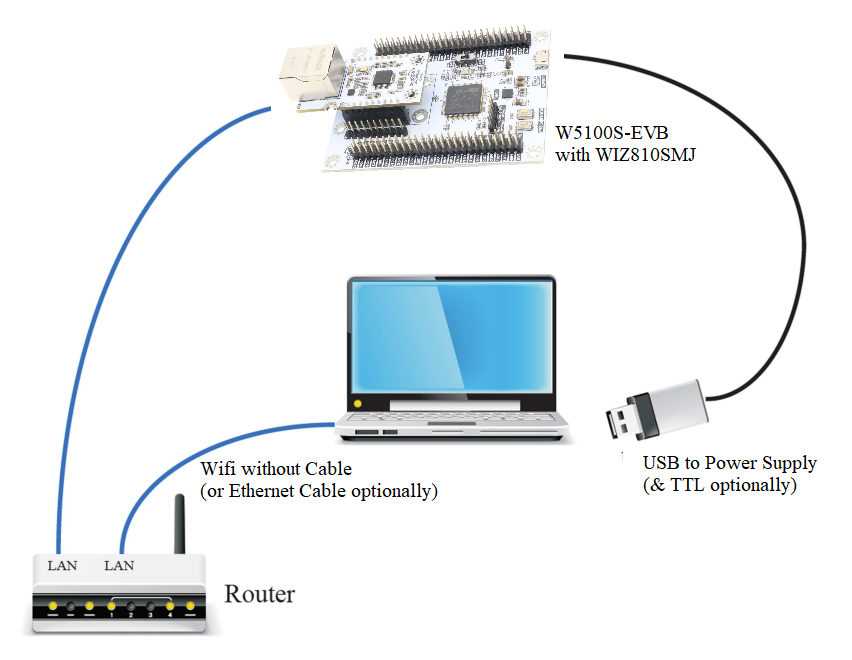
As illustrated in the picture, you may choose to whether connect your W5100S to your PC, depending on whether you would like to get debugging message.
If you are not connecting you PC with ethernet, please make sure you know your router’s IP configuration clearly. For you reference, open your cmd windows, type “ipconfig -all” and a message similar to the picture below would be shown:
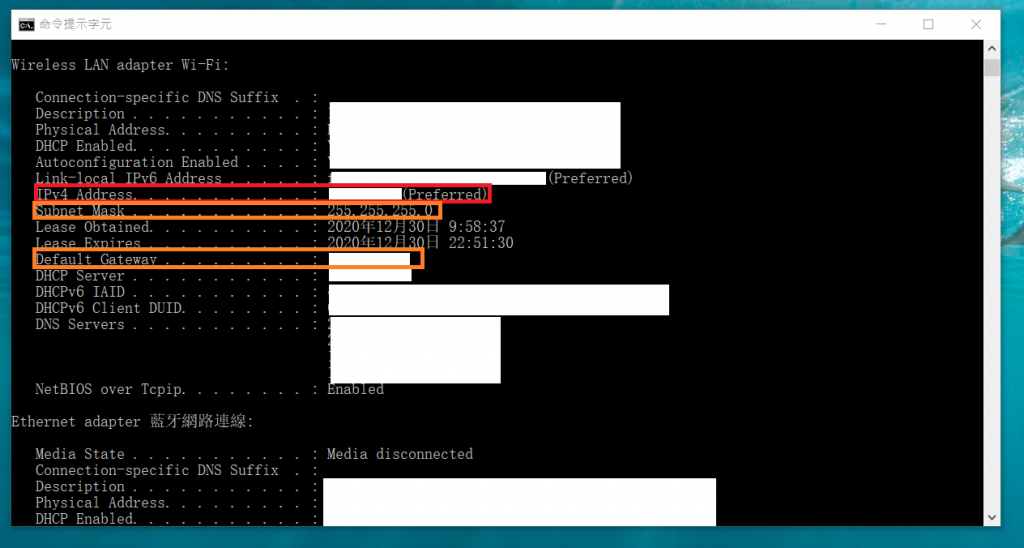
After that, go to your source code and change the parameter of “server_ip[]”, “lip[]” and “gw[]” according to the message shown on the cmd window.
Then, you will probably be good to surf the Net with your W5100S.
Resources:
https://wizwiki.net/wiki/doku.php/products:wiz810smj:start
https://www.w5100s.cn/index.html
https://www.wizse.com/download/sockettester/
https://www.wizse.com/download/wiz-uarttool/
https://www.wiznet.io/wp-content/uploads/2019/01/WIZ810SMJ-DataSheet-V1.0.pdf
Purchase:
https://www.wiznet.hk/en/evaluation-board/104-iomodule-carrier-board.html
https://www.wiznet.hk/en/network-module/89-wiz810smj.html
Official page: https://www.wiznet.io/product-item/wiz810smj/