It has been a week that I didn’t update about IOT application on W5500. Let’s have a look for this weeks article on the second step of IOT application on W5500.
For this week, we will talk about the google spreadsheet script with W5500 solution.

In the previous article, it shows the following information.
1. Gather Temperature information & Humidity values from a DHT11 sensors to W5500-EVB
2. Communicate with a cloud server call pushing box for delivery information to a destination location.
3. Using W5500-EVB as the gateway & pushingbox cloud server to deliver all the sensor information to twitter.
If you have any problems on how to communicate a cloud server with W5500 solution or getting a detail information about this IOT application. Please refer the previous article “Develop a IOT solution by using W5500 part 1″ for more information.
For this article, I’m going to towards one more step to manage these data into google spreadsheet for recording purpose.
For this part, it includes the following parts need to do.
1. Create a google spreadsheet
2. Create a google script by java codes to dump the data into google spreadsheet
3. Set the correct format on pushingbox to delivery the message through google script link.
Create a google spreadsheet:
I think this is the most simple part for this article. As normally, most of the people will have google account or gmail account for searching information or checking emails.
Anyways, I will still briefly shows the method on creating a google spreadsheet.
After you had a google or gmail account, it normally includes a google drive storage system for you to save information.
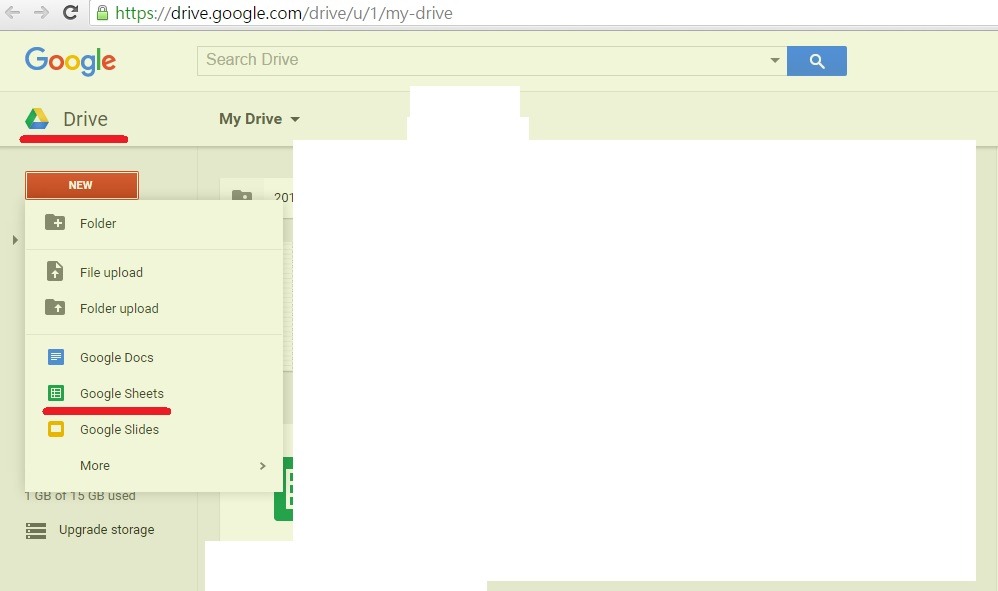
Please go to google drive page and press “New”, it should directly open a choice for google spread sheet. Please press it and it will open a blank spread sheet. The following figure shows the steps for opening a spread sheet through google drive.
After you created a spreadsheet, please modified as you want. However, the first 3 columns will use for saving the results that collected from the sensors.
a) Received time b) Temperature c) Humidity
Therefore please keep the first 3 columns for the usage on these information inputs.
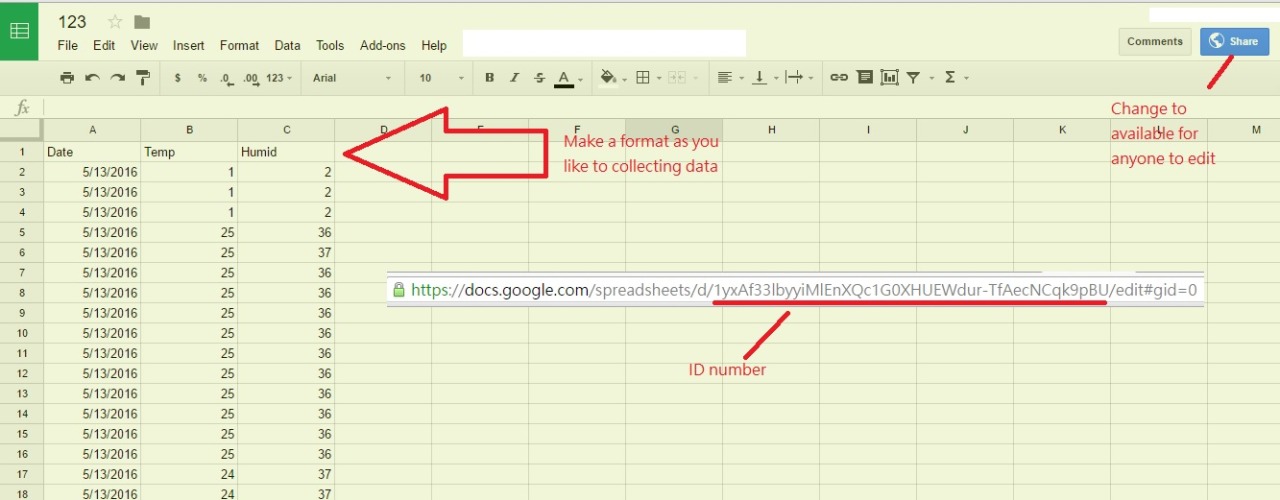
In the figure, it shows the location of ID number, this is for the usage of the script to communication with the spreadsheet.
Before you start writing your script, please remember to unlock the editing and viewing rights to public. Therefore you could allow the script to modify the spreadsheet.
Google Script:
For this section, I found a very useful link that I wanted to introduce to you. This developer has develop a google script that is specific for IOT application base on W5100 Ethernet shield. The developer has created a Youtube video and provided his google script to everyone to easily get used on this code.
For more information, you may visit the following link:
http://jarkomdityaz.appspot.com/
Scrolling down to the bottom will have all the information that you need.
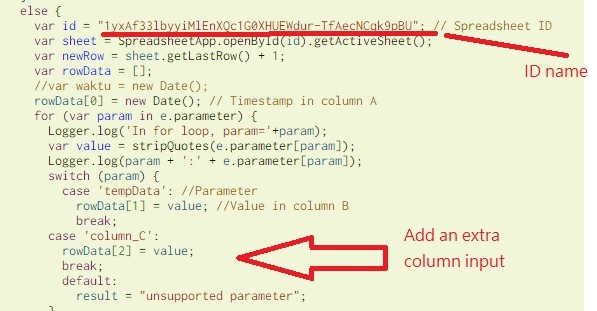
By having this script, it reduce a lot of workload on developing my version of script with our W5500. Thus, I had made the following modification on the script.
1. Adding the ID of the spreadsheet from the source code.
2. Add an extra column for humility value
The following figure shows the modification part of the codes.
Please remember to modify all your settings before you activate these codes into Web app.
After you had saved all these data, you are required to do the following steps to make sure this script is working normal in web app.
1. Upload for personal use – Testing the application is it working normally. It requires access to google drive confirmation window. Please press allow to proceed
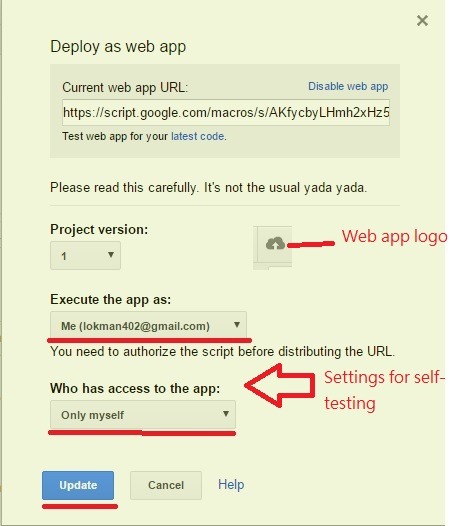
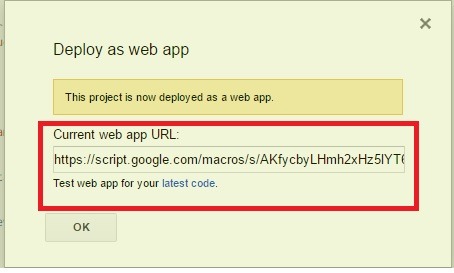
After you pressed deploy or update, it will show the following link for you to use.
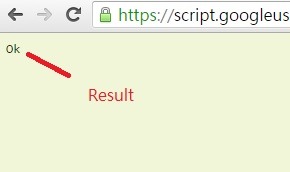
2. Copied the link to test the script. It will show “ok” for result.
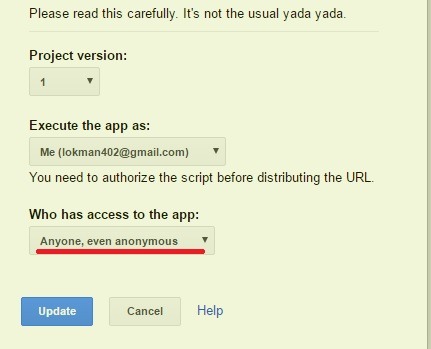
3. Change the settings to allow other people to modified
4. Change the values with the new link and add values into end of the link.
&tempData=1&column_C=2
The above are the parameters input to the second and third row. (The first row is for received time)
Then, you will see the following result.

Pushingbox delivery:
Right now, we could go back to pushingbox to put the sensor information to the spreadsheet.
If you have any problem on this section, please refer my previous article –
Develop a IOT solution by using W5500 part 1.
The following are the steps to set an whole scenario.
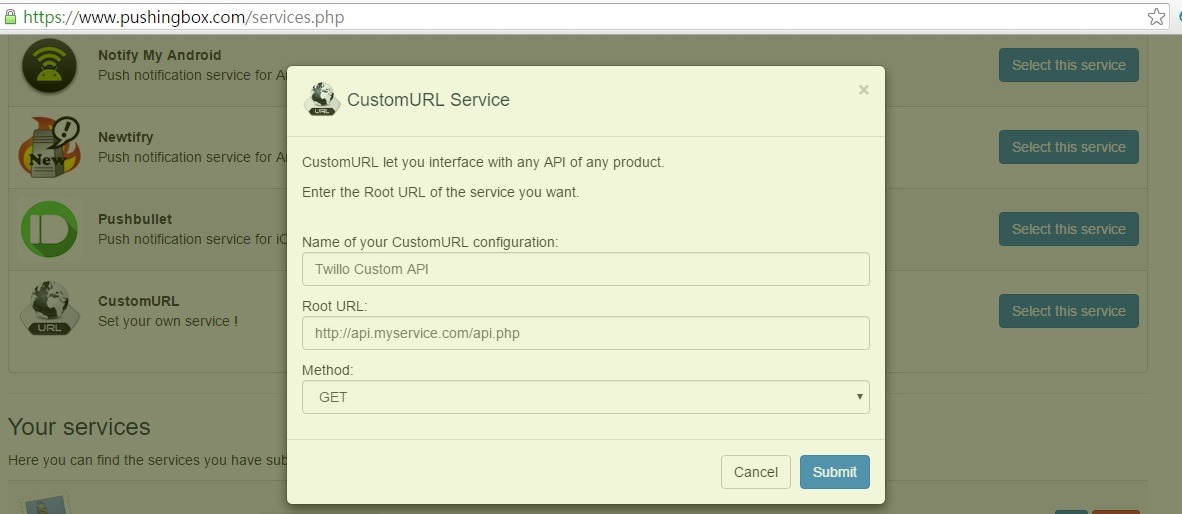
1. Create a custom URL link for the location platform
2. Input the link and create a name for this service
3. Set to get format and create this service
4. Create an scenario
5. Add an action for this scenario and put the custom URL service into this scenario

6. Add the message as below.
Message : ?tempData=$temp$&column_C=$humid$
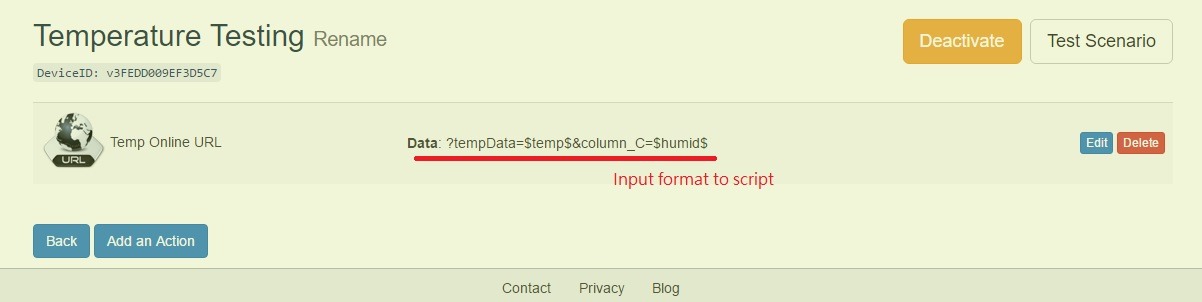
As you create the a new scenario, the device ID will be different. Thus, you are required to change the device ID as follow to communicate with the spreadsheet.

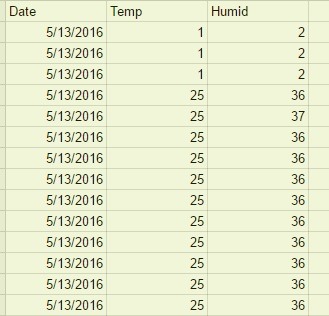
After you run the source code, you should see the following information from your spreadsheet.
Reference: jarkomdityaz.appspot.com