In the previous articles that I had made, it allows us to have the standard understanding on communicate with two types of Cloud server through W5500-EVB.
This time, let’s try to develop a whole IOT solution base on the following section
1. Communication method between WIZnet’s solution and Cloud Server
2. Adding sensors into the device to transmit data to Cloud Server
3. Using Android application to view the data that received from Cloud Server
This is the basic procedure on creating an IOT application.
In this series of articles, I wanted to add something extra features for this application.
a) Adding spread sheet script to save all records collected from the sensor.
b) The android application will show the Sensor’s record.
From having the experience on developing source code for communicate with Cloud Servers, I think this is the best time for us to head into creating the whole IOT concept design.
For the first article, I will show you the basic on communicating with W5500-EVB to another Cloud Server called Pushing box .
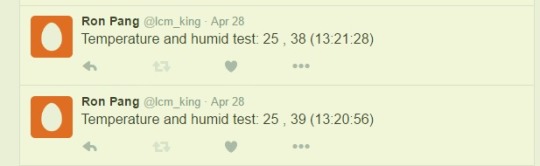
After that, It will connected with DHT11 sensor to publish these data on Twitter.
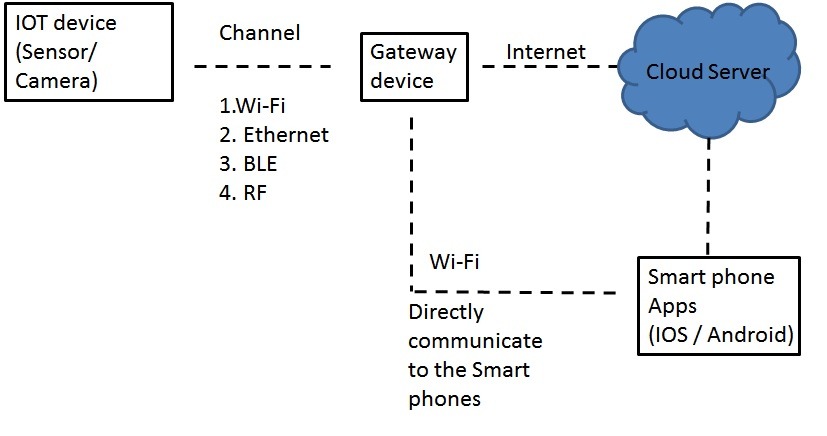
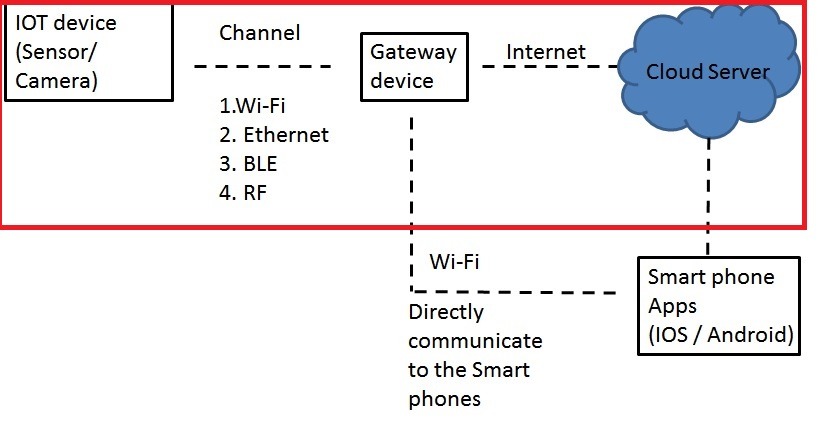
The following figure shows the section in this article.
For this section of development, we required the following items.
1. W5500- EVB (If you don’t know anything about this Evaluation board, you may read my previous article on How to communicate with MQTT server through W5500)
2. Ywrobot’s Easy Module Shield’s DHT11 Sensor that records Temperature and Humidity.
3. Cloud Server – This time, I will use Pushing box cloud server. This server is simple to use and it has a function that pushing the received information to the location that you wanted to post. In example, Twitter.
For this Cloud server, it could only send out only 1000 messages per day.
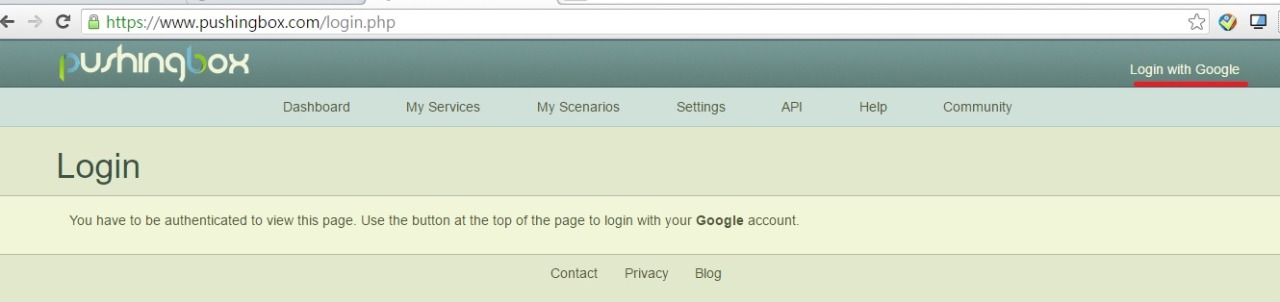
PushingBox Cloud Server
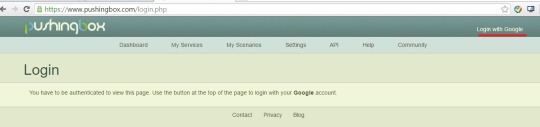
This Pushing Cloud server is very simple to register and operate.
Link: https://www.pushingbox.com/
Registration: Using google account to login.
As the name of this cloud server is called PushingBox, this cloud will directly push out (Send out) the data received data from the W5500-EVB to the location that you set.
First, we need to know the location platform to push. This require us to set from “My services” setting.
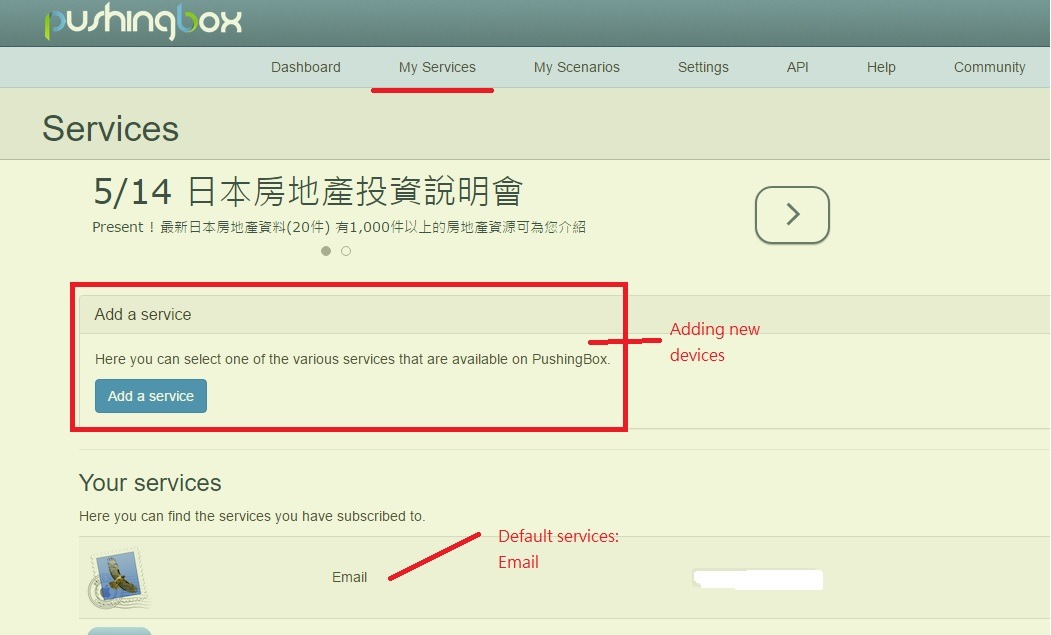
About adding devices, it means it will add the location platform for pushing those data. You could choose Twitter, email or even push to a specific link for your own use.
For this cloud server, you are capable to modified the delivery message to the system. By setting “My Scenarios”, you could changed it in any kind of format.
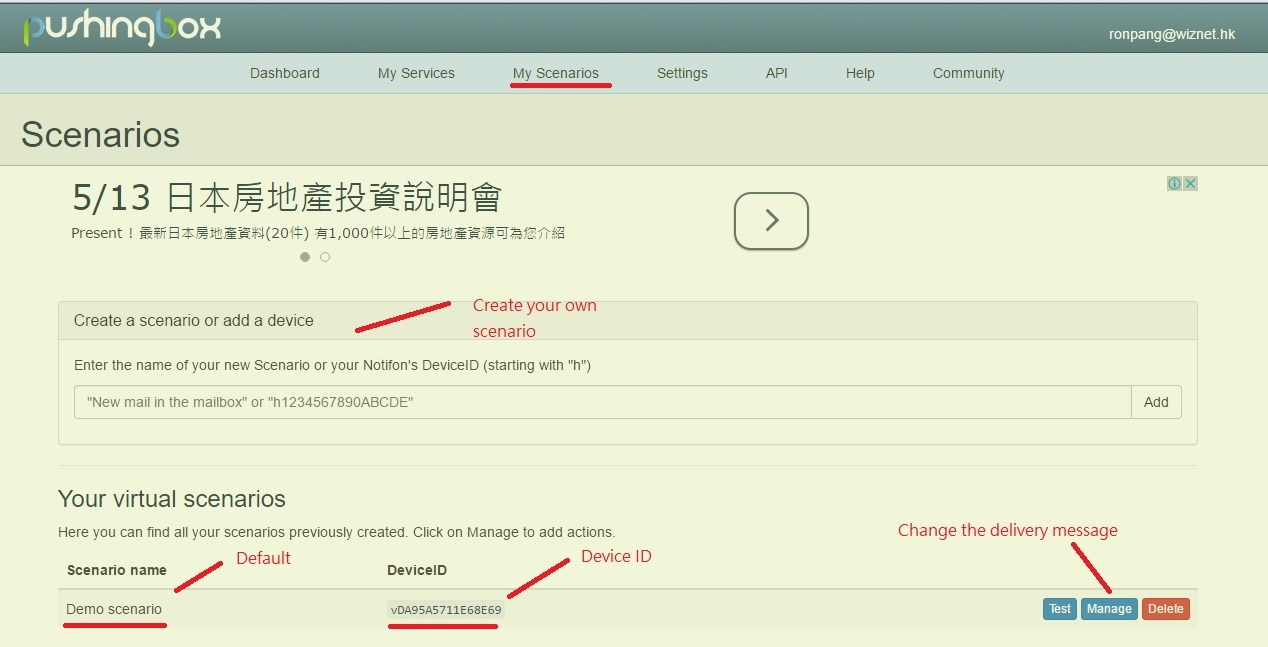
As there is a default scenario in this server, we will just change this for our testing with Sensor’s result.
After we pressed the manage button at the right corner, it will show the following information.
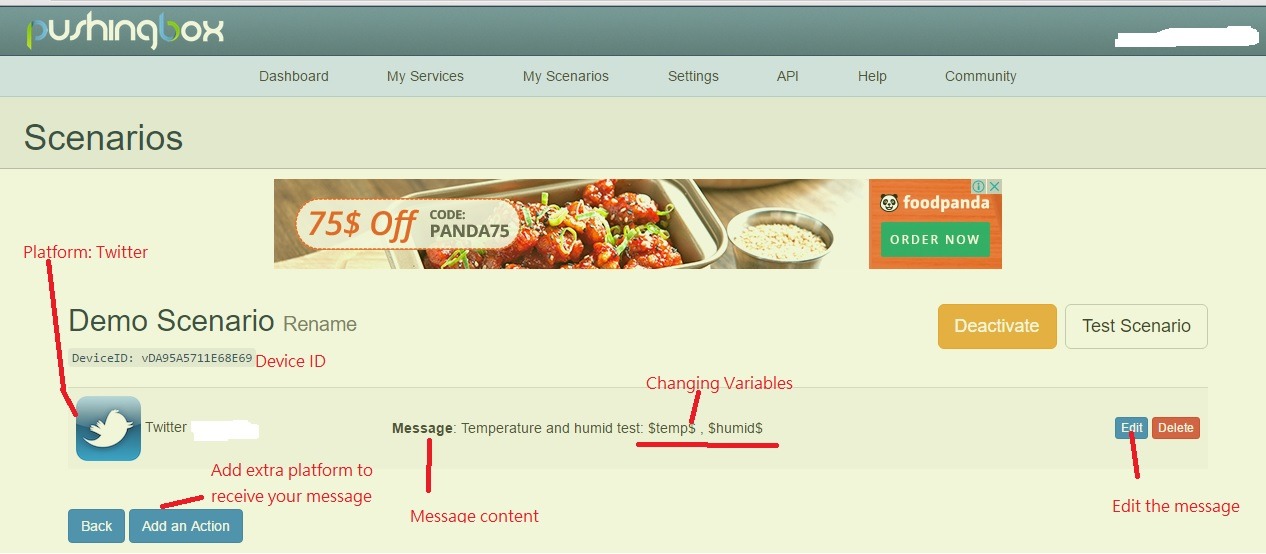
As the above figure shows, there are few things that you could be modified.
1. Add an extra platform to received your message. (Please remember to add the platform on My Services)
2. Editing your message
3. It could accept changing variables in certain of format. ($xxx$)
Now, we could move to the next stage for modifying the source code for W5500-EVB.
Source code
For the source code, we will use the HTTP client reference source code for the this testing.
The connection method to this cloud server, the IP address could find from the Help section of this website.
If you have any difficulties on connecting with the Cloud Server, you may read the previous blog article – How to communicate with Xively server based on W5500 chip.
The next step is changing the HTTP request method for this server.
For the HTTP request method for PushingBox Cloud server, it is very simple. You are required to send the format as follow will be fine to communicate with the server.
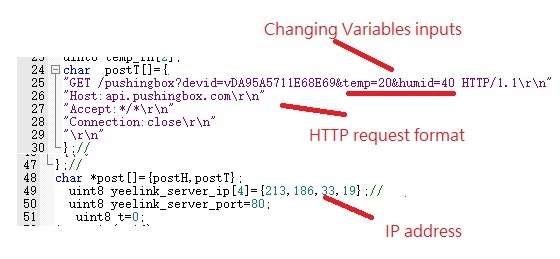
As the above figure shows, the HTTP request method does not required any key’s or password to login into the Server.
The only requirement is the Device ID that needs to add before the Changing variables inputs.
The Changing variables name are required to define from the PushingBox “My scenarios” Section and used equal sign for adding the value for that specific variables.
Pushing Box has provided some other API sources code.
Please refer the link: https://www.pushingbox.com/api.php
For the method on changing the variables, you could set your code by changing the related variables from the array. The result value from the DHT11 sensor will replace those value as follow.
case SOCK_ESTABLISHED:
	it(getSn_IR(ch) &Sn_IR_CON)
	{
		setSn_IR(ch, Sn_IR_CON);
	}
printf(”\r\ nWorking ? \r\ n ") ;
		it(DHT11_GetValue(temp_rh))
		{
			nencpy(Buffer.post[1], strlen(post[1]));
			Buffer[44] = temp_rh[1] / 10 + 0x30:
				Buffer[45] = temp_rh[1] % 10 + 0x30;
			Buffer[53] = temp_rh[0] / 10 + 0x30:
				Buffer[54] = temp_rh[0] % 10 + 0x30;
			send(ch, (const uint8 *) Buffer.sizeof(Buffer));
		}
		Delay_ms(1000); recv(ch, recv_buf, sizeof(recv_buf)); printf("\r\n %s \r\n”, recv_buf) ;
			Delay_s(30); close(ch):
			break;
About connecting with Easy Module Shield, you could also read the previous article for more information –
How to communicate with Xively server based on W5500 chip.
Finally, you will have the following result on twitter.