項目描述
這個教程會告訴你如如何將 mbed LPC114FN28 連入 AXEDA 服務,實現物聯網!
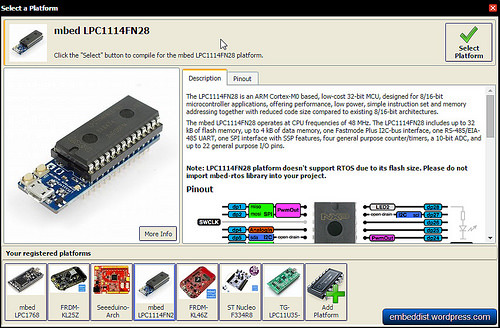
mbed LPC1114FN28
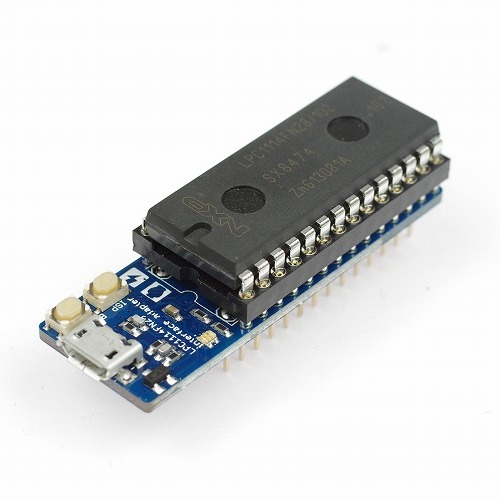
合作平台: Switch-Science
mbed LPC1114FN28 需要運行在 48MHz 的 CPU 主頻下。LPC1114FN28 擁有高達 32KB 的 Flash 存儲空間,高達4KB的數據存儲空間,一個快變模態 I2C 總線接口,一個 RS-485/EIA-485 UART 接口,一個帶 SSP 的 SPI 接口,4個通用計數器/定時器,一個10位的ADC,還有22個通用I/O 引腳。
注意:由於 flash 的大小限制,LPC1114FN28 不支持 RTOS。請不要把 mbed-rtos庫引入你的工程。
mbed LPC1114FN28 已經非常限制了存儲空間,而且無網絡連接。另外,LPC114EN28 不支持 RTOS 及以太網接口。
如果你先要把這個板子連接到 AXEDA(一個物聯網雲服務),我們怎麼辦呢?
答案就是 WIZ550io。
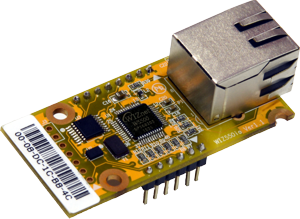
WIZ550io 是一個自動配置的以太網控制器模塊,包含一個 W5500(嵌入全硬件TCP/IP 芯片 TCP/IP 及 PHY),一個變壓器及 RJ45。支持SPI(主接口)。因此,即使主系統沒有以太網接口或者 TCP/IP 軟件協議棧(包含在RTOS中),主系統也可以輕松連接到網絡。
http://developer.mbed.org/components/WIZ550io/
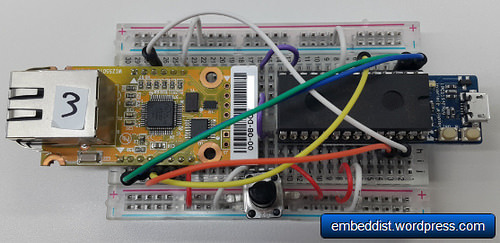
軟件連接:mbed LPC1114FN28 + WIZ550io

◾WIZ550io: 以太網連接
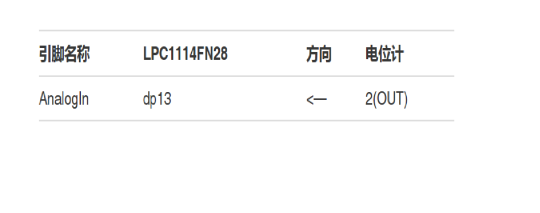
◾電位計:

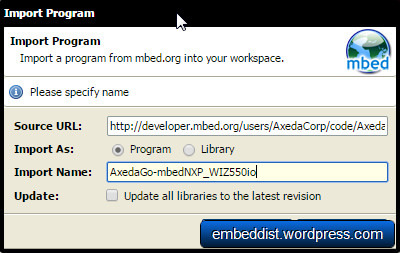
軟件 – AxedaGo-mbedNXP + W5500Interface
1. 進入AxedaGo-mbedNXT
◾點擊並進入這個程序 : AxedaGo-mbedNXP
◾將平台變為 mbed LPC1114FN28。已經為 LPC1768 做了軟件。因為我們要使用 LPC1114FN28,所以你必須在編譯器中選擇LPC1114EN28。
2. 在 AxedaGo-mbedNXP_WIZ550io上刪除以太網及 mbed-rtos 接口
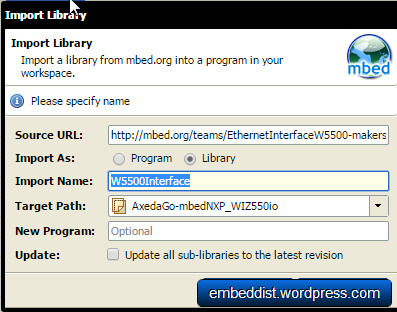
3. 入口 W5500 接口
◾點擊並進入這個程序:W5500 接口
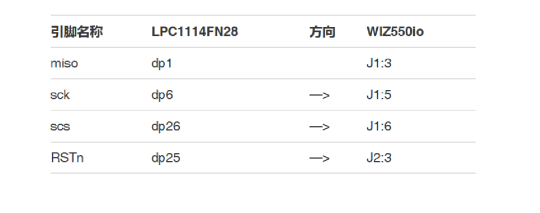
4. 移植 main.cc: 用於 WIZ550io,以太網接口初始化。需要做以下更改:
#if defined(TARGET_LPC1114)
SPI spi(dp2, dp1, dp6); // mosi, miso, sclk
EthernetInterface eth(&spi, dp25, dp26); // spi, cs, reset
AnalogIn pot1(dp13);
#else
EthernetInterface eth;
AnalogIn pot1(p19);
AnalogIn pot2(p20);
#endif
* AnalogIn端口也應該根據平台類型進行配置。
AXEDA
1. 參考:用於mbed NXP LPC1768原型版的Axeda Go套件/網站鏈接:
http://developer.axeda.com/Instructions/axeda-go-kit-mbed-NXP-LPC176
2. Axeda上的儀表盤
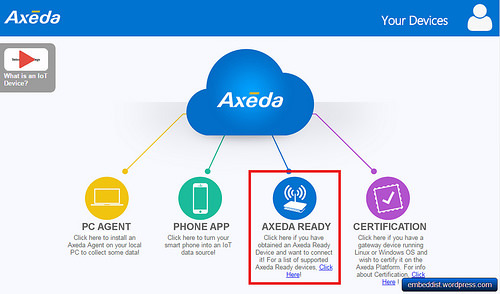
◾點擊”AXEDA READY”
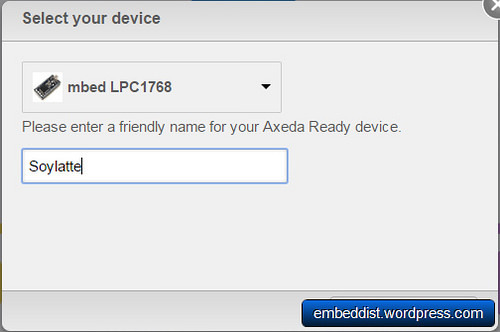
◾選擇mbed LPC1768並鍵入設備名稱
◾復制串口號
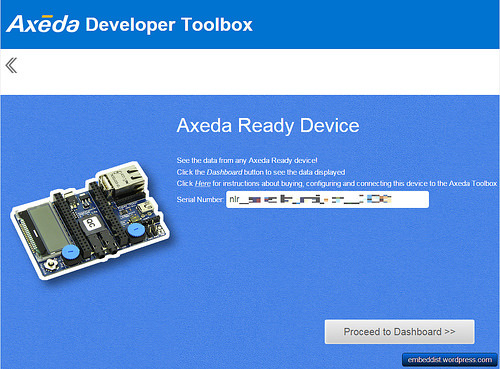
◾在代碼中輸入串口號(main.cc)

盡享 LPC1114FN24 + WIZ550io 在 AXEDA 的樂趣
點擊頁面頂部“編譯”按鈕並在你的平台上下載.bin文件
◾串口終端日志:檢查你的DHCP IP地址,電位計值,通過串口終端發送調試信息。
initializing Ethernet
– Ethernet ready
Ethernet.connecting
– connecting returned 0
Trying to get IP address..
– IP address:192.168.13.53 //<— DHCP IP address
Sending Value for well1 0.00 //<— Potentiometer value
Received 36 chars from server: //sending message
HTTP/1.1 200
Content-Lengtved 36 chars from server:
HTTP/1.1 200
Content-Length: 0
Sending Value for well1 0.14 //<— Potentiometer value
Received 36 chars from server: //sending message
HTTP/1.1 200
Content-Length: 0
Sending Value for well1 0.27
Received 36 chars from server:
HTTP/1.1 200
Content-Length: 0
Sending Value for well1 0.29
Received 36 chars from server:
HTTP/1.1 200
Content-Length: 0<span style=”font-family: Georgia, ‘Times New Roman’, ‘Bitstream Charter’, Times, serif; font-size: 16px; line-height: 1.5; background-color: #ffffff;”>
</span>
◾Axeda開發工具箱:你的mbed現在已經連接到了Axeda工具箱賬戶下。
◾在你的儀表盤中打開mbed小工具
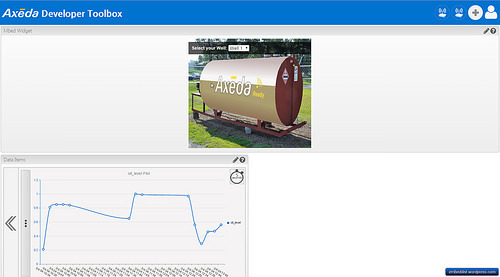
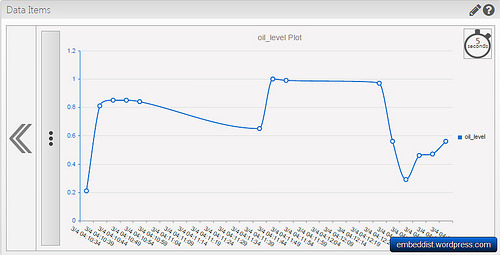
◾在數據項中,可以通過線圖來檢查來自LPC1114FN24 + WIZ550io的電位器值。
LPC1768及mbed LPC1114FN28 在Axeda上的比較
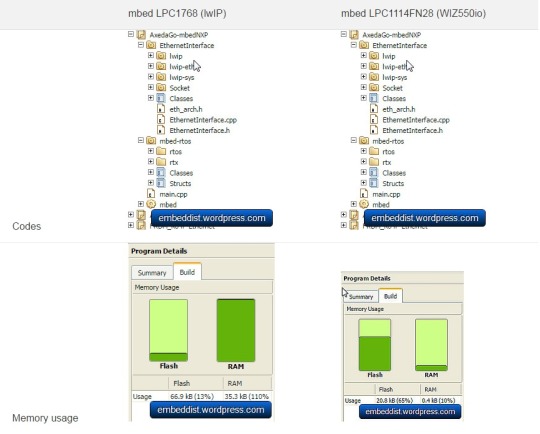
如上圖所示,LPC1768(使用RTOS)占用了66.8KB大小的Flash空間。是LPC1114 & WIZ550io占用20.8KB的兩倍還多。
獲取代碼
http://developer.mbed.org/users/embeddist/code/AxedaGo-mbedNXP_WIZ550io/