您可以使用幾乎任何型號的Arduino去建立一個以太網網關。
市場上有幾個不同的以太網模塊。我們建議使用WIZnet公司W5100其卸載Arduino的MCU並保留為網關的代碼更多的內存。
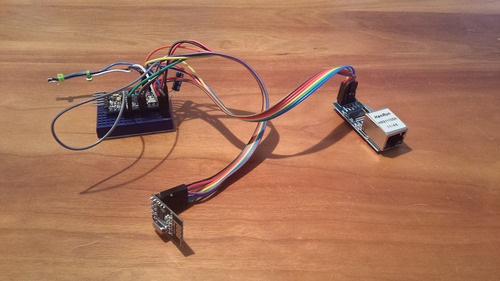
接線的步驟
射頻模塊必須連接有點不同於標準傳感器連接,因此請務必仔細按照接線說明如下。
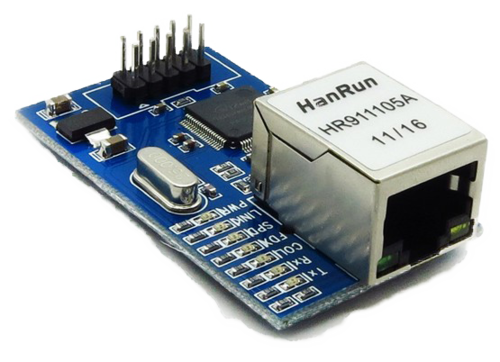
WIZnet (W5100) Ethernet module

注:請參閱下面的配置說明!
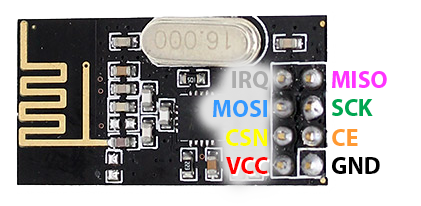
NRF24L01 Radio module

注:如果沒有其他說明,以太網模塊應採用3.3V供電。
Configuration
WIZnet公司W5100:編輯RF24_config.h在(XXX/庫/ MySensors/實用程序),使softspi(“#定義SOFTSPI”之前刪除//)。
這必須被還原回來時,你已經編譯並上傳代碼到你的網關。
ENC28J60:啟用正確的以太網庫,如下圖所示:
#include <UIPEthernet.h>  // Use this if you have attached a Ethernet ENC28J60 shields
//#include <Ethernet.h>   // Use this for WizNET module and Arduino Ethernet Shield
選擇要使用網關的靜態IP地址和端口。
#define IP_PORT 5003        // The port you want to open
IPAddress myIp (192, 168, 178, 66);  // Configure your static ip here
最後,編譯和使用Arduino的IDE修改草圖上傳到您的Arduino網關。